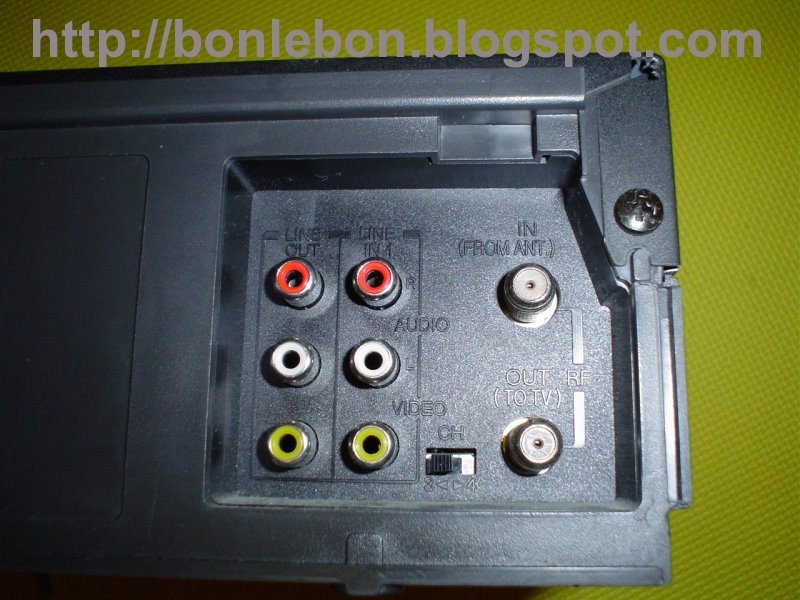
As you may know all VCRs have frequency modulators, this capability converts the video signal from the tape or composite input (s-video input too depending on the model) into a frequency the TV set can allocate as channel, most likely channels 3 or 4.
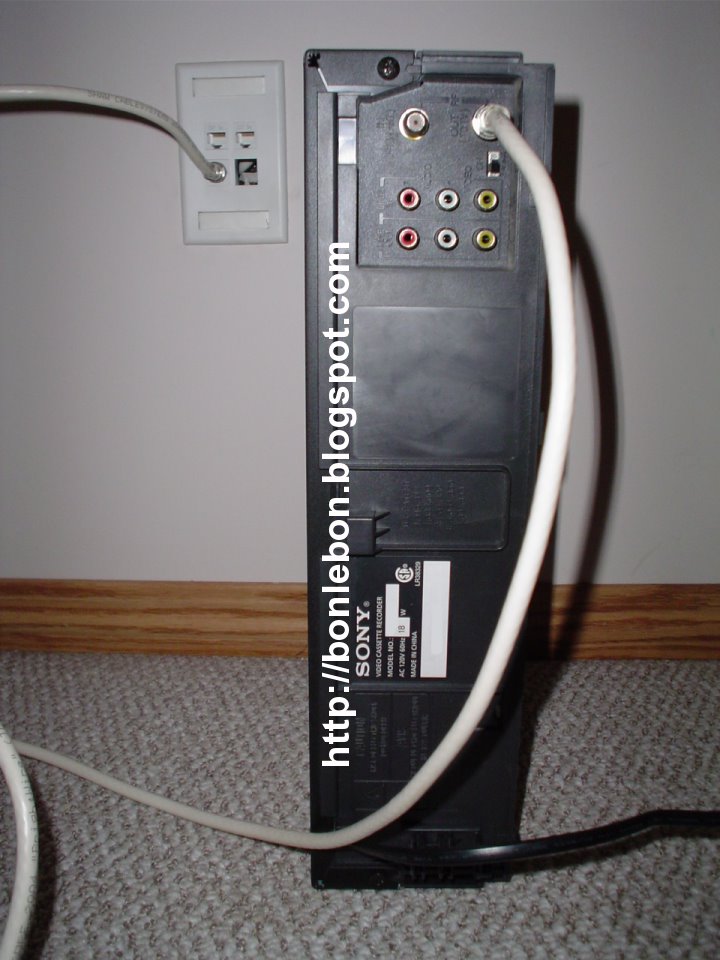
Most homes nowadays are cable ready, this means there are coax cables running from a central box called a signal splitter to almost all the rooms. In case your place is not cable ready you can go to your local hardware store conglomerate and buy all you need, they can help yoy with the possible options like running the cable within the walls on from the outside, use what suits you best or your pocket allows.
The idea of this hack is to take the video output signal from a PC, route it to the splitter box and let all the TVs hooked have access to the signal that is being "broadcasted".
The pros of this configuration are:
- You won't depend on just one TV to have access to media content stored in your PC like vidcasts, IPTV or movies.
- Due this is not wireless you don't have to worry from anyone snooping what you see or leeching content that may have cost you some well earned bucks.
- You can control your new media center with a web interface.
Some cons are:
- Loss of signal quality, this can be fixed if you are willing to spend some extra money in hardware.
- If you have cable you may want to reconsider buying an extra splitter box and re-wire according to your needs.
Hands on
Disclaimer: I assume no responsibility on damages to property or personal injury for the suggestions expressed on this article, if you don't feel confident on what you are doing or don't know how to perform the instructions here expressed stop immediately and call a technician. There is chance of electrocution and hence death/severe harm if you run wiring in your house/apartment the wrong way, you have been warned.
What you need:

1) An old VCR that is at least able to accept composite video as input. You can get one at your local thrift store, your local freecycle group, convince somebody to pass one to you or look for one the classifieds section (garage sales are your friends). You can also use a DVD player if it has this feature, the only problem would be playing your DVDs and controlling them.
2) The PC I'm using has a S-Video output so I've got a RCA-to-S-video signal converter, you can buy one at Radio Shack or Build your own.
3) A RCA video cable or Video and Audio (3 connectors) RCA cable depending on what you have.
4) If your PC has a 1/8" stereo audio socket you might need a Y-Adapter Audio Cable, again you can get one from Radio Shack or Build your own.
5) Some coax cable.
If your current home cabling is not labeled as mine you have to determine what cable corresponds to the each room, this will help to make the reconfiguration faster and label those cables once and for all. First locate the closest cable hook point close up to your PC, attach the VCR to it and play a tape, make sure the channel switch on the VCR is set to channel 3, if you prefer channel 4 have it in mind for the rest of the instructions.
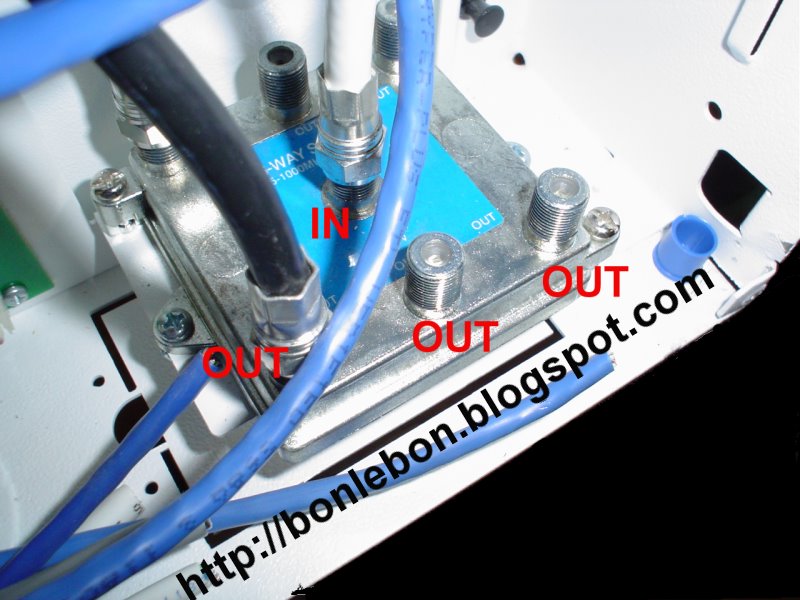
Go to the splitter box and unhook the cable connected to the IN connector, turn your closest cable hooked TV set to channel 3, if you are not close enough to see it make sure the volume is high enough for it to let you know when you hit the right cable. Try each cable hooked to the OUT connectors in the IN connector one by one, take your time and make a good connection till you hear the VCR tape playing. This is the opportunity to turn on the rest of the TVs in your home one by one, unhook the cables connected to the OUT connectors to see what cables goes where.
Go to your PC and hook the video output and audio output to your VCR input, remember to mind the colors they exist for a reason.
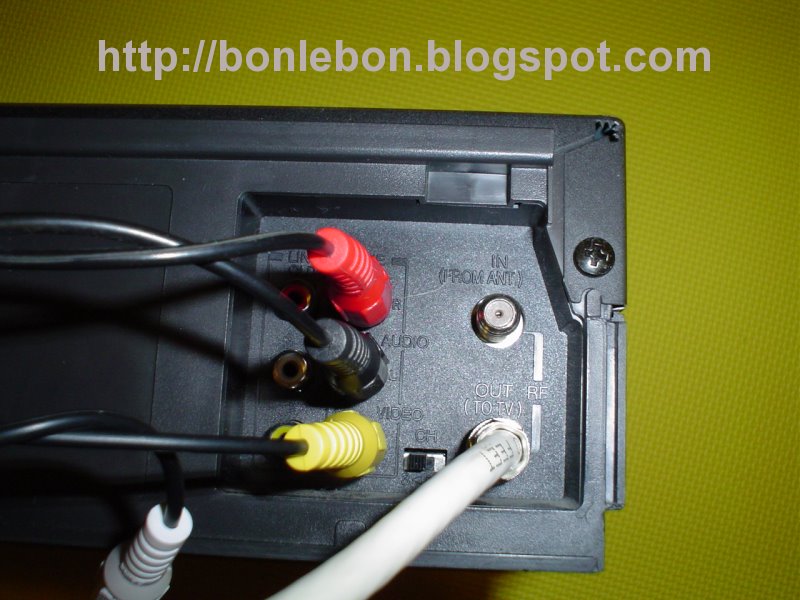
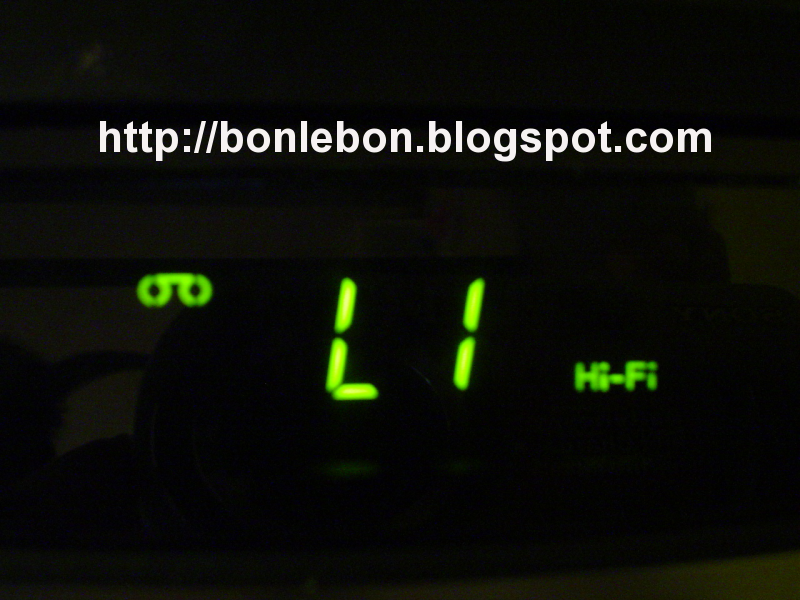
Stop playing the tape and turn the channel in your VCR to the input line, in my case L1.
If you have a windows box go to it and enable the video output, independently of your video card (most the times) go to the display properties applet from your control panel or right clicking your desktop, hit the Settings tab then the Advanced button, click on the Displays tab and click on the TV's power on button (check your card manufacturer instruction on how to set the video output on in case of discrepancies with this tutorial. Linux users with a Myth TV are more than ready to broadcast, you can get instructions one how to assemble a Linux media center HERE
By this time all the TV sets at your place should be showing your PC's desktop and your actions ;).
Get your favorite IPTV show and play it full screen with your favorite player and off you go. Is worth to mention that the video resolution of the show should be good enough to display decently on your TV, mileage may vary depending on your PC configuration and video card capabilities.
Sharing your desktop with the video feed
So far so good, but, what if you want to continue using your PC while broadcasting video to the rest of your house?.
Very easy, all you have to do is enable the "extend my windows desktop onto this monitor" option for your TV set on your display applet. This will let you integrate your TV set to your desktop giving you more free space (we shall call it the "TV SCREEN"), all you have to do is drop your video screen there and you will have your desktop all free, just remember any noise on your PC will be heard on the TV, you can disable the mouse click to attenuate this "problem".
A complete explanation can be found HERE.
Controlling your broadcasts remotely
Walking back and forth to your PC to control the broadcasts seems like a bad idea unless you want an incentive to stay active at home.
VLC Media Player comes to the rescue, this little sweet piece of software is capable to handle mostly all the video features you may think or need.
VLC comes with a http interface that enables remote web based controlling, to activate it open a windows command shell and type this at the VLC's home directory, most likely C:\program files\videolan\VLC:
vlc -I http [--http-src "C:\Documents and Settings\baboo\mytechvideos" --http-host 192.168.1.100:31337] --fullscreen --video-x 1024 --video-y 0
Substitute the quoted string with the directory where most of your media is. Also you can chance the number of the port "31337" to whatever you want.
FYI: You cannot reposition the "embedded" VLC player onto the "TV SCREEN", only the interface modules are able to use the video-x and video-y options.
At this point you can close the command shell window, VLC will start running playing the first item on the directory you pointed to.
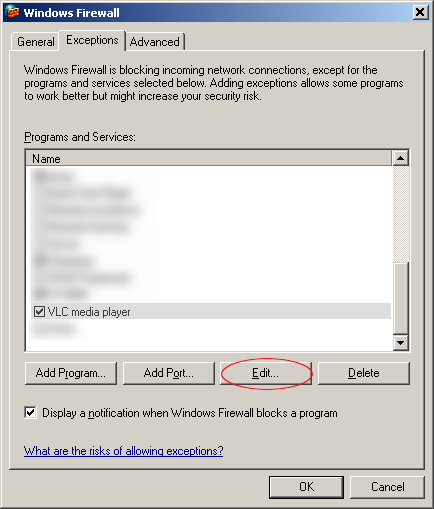
Piece of advice: go to your windows firewall and make sure only PCs in your network can connect to your VLC host, this will attenuate but not necessarily avoid someone from the internet exploiting or connecting to this open port, remember to configure and recheck your router/firewall and watch out for software updates or any security issues.
Go to windows firewall, select VLC media player and then click edit,
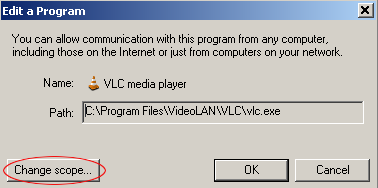
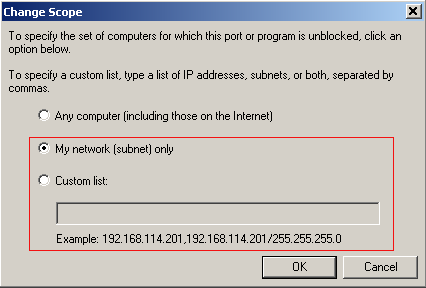
Select either My network or custom list (write allowed hosts as the example shows):
Point your PocketPC, zaurus or wireless laptop web browser to the VLC's host PC, in this case 192.168.1.100:31337:
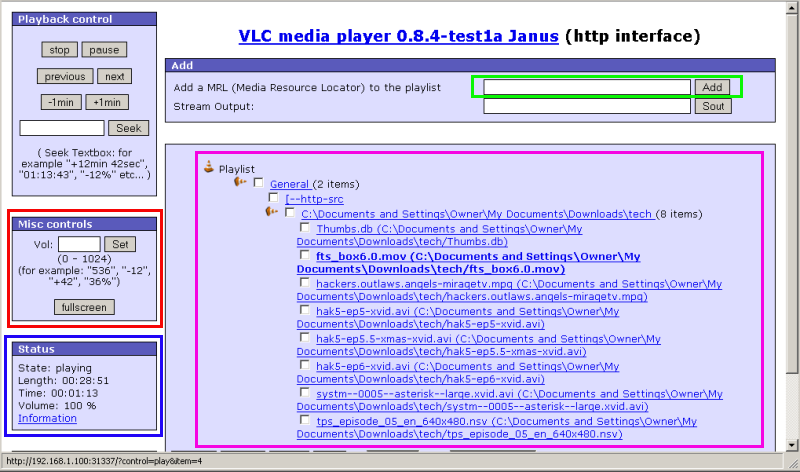
As you see is an easy and intuitive interface to work with, I will explain the main features:
The red square encloses the full screen and the volume options.
The blue square encloses the the current status of the player, check for it playing, stopped or paused statuses, just hit refresh in your browser to make sure.
The green box lets you add more directories or media files to your playlist.
The purple box encloses your playlist, all the files contained here will play sequentially starting with the one on the top. Also you can click on any of the links if you change your mind on what to watch first.
Finally IPTV:
Well this is all by know folks thanks for coming by, soon I'll bring more stuff, also keep in mind this blog updates daily.
Bonlebon